At home, by definition, it should be warm. It can be provided in a variety of ways. However, a prudent owner seeks to do this as efficiently and economically as possible. Among these options is the installation of a wall-mounted gas boiler. And this is quite justified, since gas heating is very profitable, and the equipment is quite simple to operate and install.
If you also began to think about purchasing a wall-mounted boiler, then be sure to read our material. In it we will try to tell you as much as possible about the principles of operation of such equipment and the types of wall devices. And also consider all the nuances of connecting such a system.
The principle of operation of a wall-mounted gas boiler
The installation and connection of the heater depends on its type. Therefore, you need to understand exactly how the device works and which of its varieties to deal with.
Any wall-mounted gas boiler is a compact device with a maximum power of 42 kW.

Wall-mounted gas boilers - powerful compact devices that provide premises with heat and hot water
The main elements of the system include:
- Gas burner. It delivers gas to the chamber where the combustion process takes place. Using nozzles, the fuel is distributed as evenly as possible. Modern modulated burners can maintain the set temperature and regulate the power of the flame.
- Heat exchangeralong which the coolant moves. The best efficiency of a copper device. In condensation boilers, there can be two such elements.
- Expansion tank. Designed to compensate for excess water resulting from heating.
- Circulation pump. Powerful models can have two of these elements.
- Boiler automation or a system of devices whose task is to maintain a given temperature in a heated room. May include appliances powered by electricity or non-volatile.
- Devices that control and regulate boiler operation.
- Fan. Used only in turbocharged models.
- Security system. It stops the operation of the boiler in case of dangerous situations.
Modern models are additionally equipped with self-diagnosis systems that can determine about 90% of boiler malfunctions. The number of the diagnosed breakdown is displayed, which is quickly corrected by the master from the service.

The figure shows a diagram of a double-circuit wall-mounted gas boiler with a closed combustion chamber
Varieties of Wall Devices
According to their functional purpose, gas heating units are divided into two groups:
- Single-circuit. Designed for heating only. They are connected to the heating circuit and heat up the coolant. The organization of the supply of hot water in this case is carried out by installing an electric or gas water heater of any type.
- Bypass. They heat the room and provide hot water. An additional circuit for heating water is built into the boiler. The technological feature of the device is the impossibility of simultaneous heating of water and space heating.
The priority action of dual-circuit units is water heating, the heating operation stops at this time. Given that water can be heated quickly, the boiler heats the building quite efficiently.

If it is planned to include both heating of the heat carrier and the supply of hot water in the tasks of the gas unit, then it is better to purchase a dual-circuit boiler. They come with one or two heat exchangers. When equipped with two can simultaneously serve two circuits
According to the method of fuel combustion, all devices are divided into the following two groups.
Group # 1 - devices with an open combustion chamber
Such appliances are also called natural draft heaters. The oxygen necessary for combustion, they take from the room in which the device is located.
For the removal of combustion products they need a chimney of a traditional type. Thus, a mandatory requirement for the installation of such a boiler is the arrangement of good ventilation.
If the heater is mounted in a residential building, high-performance fresh air ventilation must be equipped here.
The best option for installing a heater with an open firebox is considered to be the presence of a separate room, the so-called furnace, where it is placed.
Systems with natural ventilation are quite popular due to their low cost and non-volatility.

The figure schematically shows boilers with open and closed burners
Group # 2 - devices with a closed combustion chamber
Turbocharged devices are equipped with a closed combustion chamber. The air, without which the combustion process is impossible, they take from the street. For this, the devices are equipped with coaxial type chimneys.
Such a chimney is made in the form of a structure of two pipes, one of which is embedded in the other. Through the inner pipe, the products of combustion are discharged to the outside.
At the same time, street air enters in the opposite direction through the gap between the two pipes. It is clear that boilers with a closed firebox do not affect the composition of the air inside the room, which makes it possible to equip them even in living rooms.
In this case, it is necessary to equip the coaxial chimney system, which is characterized by a higher cost and more complicated installation compared to a separate traditional chimney.
Is self-installation possible?
With your own hands, you can install a wall-mounted gas boiler of the simplest modifications. Such as, for example, single-circuit devices with an open combustion chamber.
To install them, you will need to connect a heating system, supply gas and organize a chimney. However, some manufacturers of boilers in the technical documentation for their products indicate that the installation should be carried out only by specialists.

Installation and connection of a gas boiler is a responsible and rather complicated work. Many heating equipment manufacturers require professionals to do it.
In this case, self-assembly of even the simplest models is prohibited. Thus, if it is planned that the equipment will be installed independently, you must make sure that the manufacturer permits this before purchasing it.
Checking the correctness of the installation and connecting the device to the gas line should be carried out only by a specialist with special approval.
In addition, the representative of the gas service must also issue a permit for the operation of the installed equipment. Serious fines await without this owner of a self-installed and running appliance.
Thus, without inviting specialists, you can only connect the device to the heating system and to the water supply. And it is advisable to do this only if there is a certain experience.

Wall-mounted gas boilers are installed in autonomous forced-type heating circuits with natural coolant circulation
Where to start installation?
First of all, you need to prepare the documentation that is necessary for installation. Start by initializing the gasification of the room. It can only be started if a gas pipeline is connected to it.
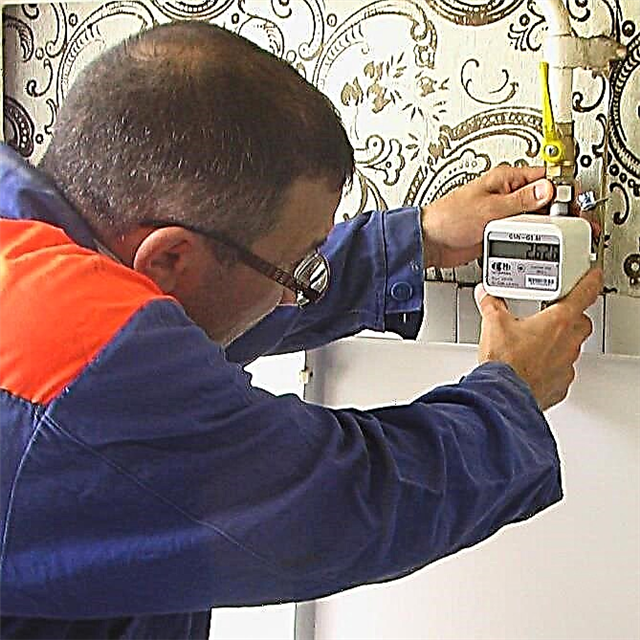
Then the owner submits an application to the appropriate services, in which he indicates the volume of gas consumption he needs in a month or year. In the case of a satisfactory response to the statement, the gas pipeline suitable for the premises is necessarily equipped with a meter.

Before proceeding with the installation of equipment, it is necessary to develop and approve the installation design. All items which should be followed exactly
The owner receives permits and technical specifications on the basis of which a project for connecting equipment should be developed.
The latter includes a scheme for laying gas pipes from the heater to the point of insertion into the main and all installation conditions for the equipment. The developed project must be approved by the gas service.
Together with the project, the owner of the room where the boiler will be installed provides a certificate of conformity and a data sheet of the purchased equipment, an expert opinion on its compliance with all safe requirements and instructions for use.
Only after the project is approved, you can proceed with the installation of the heater. In this case, all points of the design documentation should be clearly followed.
Image Gallery
Photo from
A shut-off valve must be installed on the pipe supplying gas to the equipment, blocking the flow of blue fuel after the unit is stopped
Before each pipe entering the wall-mounted gas boiler, a shut-off valve must be installed to shut off the water supply
The wall-mounted gas unit can be installed in a boiler room, the temperature of which should not be lower than 5º
The walls adjacent to the unit must be made of fireproof materials. The boiler is hung on the brackets so that there is at least 2 cm between the body with the wall, including the side
Direct contact of the wall-mounted boiler with flammable walls is prohibited. If there is no other choice, then the wall behind the boiler must be equipped with a non-combustible panel
There must be at least 10 cm between the gas stove and the installed flow-through wall equipment
The distance between the sink and the flow-type wall-mounted gas boiler cannot be less than 30 cm. The distance to the mixer from the boiler exit through the pipe is at least 1 m
In a room with a gas boiler installed, the system of natural or artificial ventilation should work effectively
Gas supply stopcock
Valves on the pipes entering the boiler
The location of the gas boiler in the boiler room
Wall adjacent to the boiler
Wall mounted boiler in a wooden house
Regulated location relative to the stove
Installation specifics for washing
Indoor ventilation grill
Boiler room requirements
Gas equipment is classified as explosive and fire hazard. Therefore, the premises in which it will be installed are subject to special requirements.
First of all, it should have natural light. At the same time, for every cubic meter of room should be at least 0.03 square meters. m of the window opening without a frame, that is, only glazing. The window must be equipped with a window leaf.

The wall on which the gas boiler is installed must be finished with non-combustible materials
Another prerequisite is the presence of forced ventilation, which can provide a change in the air volume of the room within 3 times in one hour. Thus, the gas contamination in the room can be minimized.
In addition, the capacity of the selected boiler determines the volume of the room in which it will be installed. Equipment with a capacity of 30 kW and below can be placed in 7.5 cubic meters. m boiler room.
Image Gallery
Photo from
Wall mounted gas unit in the kitchen
Separate room for the location of the unit
Wall mounted gas boiler in the bathroom
Properly installed unit
For heating appliances, the power of which varies from 30 to 60 kW, a furnace volume of 13.5 cubic meters will be required. m and above. If the heater will be placed in the apartment, it is usually installed in the kitchen.
This is possible if all the requirements of SNiPs are met. An important nuance: in this case, the total heat output from all the heating appliances in the kitchen should not exceed 150 kW.
According to the norms for installing wall-mounted gas boilers, to improve the air exchange in the kitchen door, it is necessary to make a hole with an area of at least 0.02 square meters and close it with a grill.
Experts recommend that for installation in an apartment building only equipment with a closed firebox equipped with a coaxial chimney. In the kitchens of 7.5 cubic meters. m and less, it is forbidden to install more than one heating device.

The requirements for the installation of gas heating equipment are regulated by SP-41-104-2000 and SNiP 42-01-2002. Compliance with installation standards ensures safe operation
In private houses for gas boilers, it is recommended to allocate a room separated from the living rooms by fireproof solid partitions.
It is optimal that the materials used to decorate the premises have a fire resistance of at least 45 minutes. Preferably, the layout of the premises would prevent the rapid spread of flame to living rooms.
The gas boiler can only be fixed on a solid foundation. Partitions from plywood or drywall for these purposes will not work. The wall on which the heater will be placed must be finished with refractory materials.
If this is not the case, a non-combustible substrate is mounted under the boiler. The minimum distance from the device to the supporting structures is 0.5 m to the ceiling or walls and 0.8 m to the floor.

In the photo one of the options for connecting a wall-mounted gas boiler
Step-by-step installation of equipment
Before installation, you need to unpack a brand new boiler and do a check of the completeness of delivery. The presence of parts is checked according to the operating instructions, which must be attached to the device.
If any item is missing, contact the supplier immediately. Another nuance. The boiler must have an ideal appearance without dents, chips or signs of repair. If this is not the case, you need to call the sellers.
It is important to make sure that the technical data indicated in the technical passport of the heating device exactly matches those on the device itself. In addition, they must correspond to the numbers indicated in the instruction manual of the device.
Immediately before starting the installation, you need to rinse the boiler pipes, which may contain various debris that got inside during the manufacture of the device and its transportation.

Installation of a gas boiler involves the connection of heating pipes, water supply and a gas main, as well as the arrangement of a chimney
It is also advisable to flush the heating system pipes. After the preparation is completed, you can proceed with the installation.
The specifics and the procedure for its implementation determine the features of the equipment: the number of circuits involved and the type of combustion chamber.
Most often in houses they put double-circuit appliances with a closed firebox. We will consider in detail the installation of just such a modification.
Stage # 1 - Preparing the Wall Mount
To fix gas boilers, a special bracket is used, which should be included with the device. Reliable fasteners are used for its mounting on the wall. They should be selected for the material of which the wall is made.
It is possible that those that the manufacturer packaged with the heater will not work. Then you will need to choose and purchase others.
The task of the bracket is to support the weight of the boiler and additional equipment, as well as provide it with a smooth, precisely calibrated position without distortions.
For accurate marking of the wall, you can use a paper stencil, which usually comes with the boiler. With its help, you can easily outline the holes for fasteners.
After this is done, the bracket is fixed in place and the boiler is hung on it.

Heating pipes are connected to the corresponding pipes of the gas equipment. You can determine their location by photo
Stage # 2 - connecting the heating pipes
Depending on the type of heating system, and it can be one-pipe or two-pipe, the number of pipes connected to the boiler can vary. In any case, we begin by removing the plugs from the device nozzles.
To protect the boiler from dirt particles from the heating line, it is recommended to install a strainer at the inlet of the return.
If the water in the system is hard or in other parameters does not meet the requirements stated by the manufacturer of the heating devices, it is worth taking care of installing additional treatment equipment.
These can be, for example, polyphosphate dispensers. If this is not done, the device will quickly break. All connections must be made in compliance with all rules and regulations.
Sealing is required. For this, special sealants are used: traditional paint or tow or modern thread seals. In addition, experts recommend the mandatory installation of shut-off valves for supply and return.
This is necessary to facilitate the repair of the boiler if it fails. In addition, the fittings will help prevent possible airing of radiators.

Water filter - an element that must be installed when connecting a gas boiler to the water circuit
Stage # 3 - connecting to the water circuit
These works are almost similar to connecting heating pipes. The main difference is the taps used and the diameter of the pipes.
The cold water supply must be equipped with a filter, which will eliminate the possibility of contaminants entering the heater. Otherwise, the equipment will deteriorate.
The taps used to cut off the boiler from the water supply must be with detachable connections.
Such models are also called "American". They greatly simplify installation, and in case of unforeseen situations make it possible to quickly replace a worn crane.
It must be remembered that the pipes supplying cold water are located on the heater on the left side relative to the center, and the hot ones on the right.
Stage # 4 - connecting to the gas main
This part of the work should be carried out only by a specialist with a tolerance, since the cost of an error can be very high. In any case, at the end of the connection, the representative of the gas service should check its correctness. He will also conduct the first start-up of equipment.
All operations during independent work should be carried out extremely carefully. Begin by connecting the branches of the gas line with the corresponding pipe on the boiler.

When connecting the boiler to the gas line, only a tow can be used to seal the threaded connection, otherwise the required tightness will not be achieved
A special filter must be installed on the tap that cuts off the gas supply from the line. Experts strongly recommend that you do not save on this detail.
A cheap low-quality filter will not work for long, which can cause a gas boiler to fail. When arranging a connection, special attention should be paid to its sealing.
It should be understood that the weight of the gas is much less than air, and with an insufficiently tight connection it will ooze from the pipeline. The consequences can be most dire. Therefore, thorough sealing is required.
The main materials for sealing a threaded connection are paint and tow, the use of seals like fum tape is unacceptable.
After the filter element, a special flexible connection is established. You need to know that it is strictly forbidden to use rubber hoses for its arrangement.
This is due to the fact that over time, the material from which the part is made dries and becomes covered by cracks through which gas begins to leak. Therefore, the best choice for arranging such a connection is a corrugated hose.

Corrugated hose is a good choice for connecting the device to the gas line. It is strong enough, durable and does not collapse under the influence of gas
For its manufacture, high-quality durable stainless steel is taken. This is a very strong and durable material, which is especially resistant to high humidity and the adverse effects of gas.
The hose is secured to the heater pipe using a union nut. In this case, a paranitic gasket is necessarily used, which provides the necessary sealing of the connection.
Stage # 5 - connection to the electric network
Such an operation is only necessary for appliances with a closed firebox, which need electricity. It feeds the fan, which removes combustion products, and the automation that controls the system.
Usually a standard three-wire wiring diagram is used. Experts recommend connecting the boiler to the network only through the stabilizer, which will make it possible to avoid power surges and thereby extend the life of the boiler.

If you live in an area where electricity outages often occur, then additionally
it is advisable to purchase an uninterruptible power supply - this will protect the equipment from sudden surges
voltage
Stage # 6 - arrangement of the chimney outlet
The easiest way is to connect a heater with a closed firebox to the chimney. They use special coaxial pipes. In apartment buildings, the boiler must be connected to a collective chimney.
In individual buildings, the coaxial type chimney is led out into the street through the wall. The suspension height of the pipe in this case does not matter much, since the necessary draft creates an internal fan.
Devices with an open firebox are required to be connected to an individual chimney. The boiler is connected to it by a pipe of the desired section.
The material for its manufacture is selected so that the part is resistant to the effects of combustion products, high temperature and mechanical wear.

You can check the tightness of the connection of the gas pipes with a soap solution. Leakage of gas will manifest itself by the appearance of bubbles
Before starting work, you need to make sure that there are no soot, assembly debris, etc. in the chimney. When installing the chimney, it should be placed with a slight slope towards the gas boiler.
At the exit from the device, a vertical pipe segment is installed, its length before turning should be equal to at least two pipe diameters. The total length of the connection to the chimney must be kept to a minimum.
Stage # 7 - preparation for the first launch
Before a test run, the heating system is filled with water. The fluid is pumped to a pressure of 2 atmospheres. Water is pumped as slowly as possible to remove the maximum amount of air collected inside.
In addition, the system is checked for leaks. All leaking connections must be sealed immediately.
To identify insufficiently tight compounds on the gas line, dilute the soap solution and lubricate all the compounds with it. Then watch.
In low-quality areas air bubbles will appear. All found faults should be eliminated and re-checked. The first start-up of equipment should be carried out only in the presence of a gas service representative.
The video details the regulatory requirements for installing gas wall-mounted boilers:
The video talks about the connection scheme of a wall-mounted boiler:
The video demonstrates the installation process of a wall-mounted boiler:
Installation of a gas heating unit is a responsible and rather complicated operation, the safety of all who live in the house depends on the quality of its implementation. Therefore, representatives of gas services insistently do not recommend doing it yourself..
Yes, and manufacturers of heating appliances insist on this. Therefore, it is better for even experienced home masters to turn to professionals for help, which guarantees long, and most importantly safe operation of the device.
Please leave your comments if you have questions about the topic of the article. Or maybe you yourself had to deal with the installation of gas wall equipment and you have something to advise our readers?