A modern autonomous water supply system must be equipped with a tank for storing a certain amount of water. Of course, the simplest version of such a device is a plastic or metal tank installed somewhere in the attic.
However, accumulators for water supply confidently displace conventional drives, since they more conveniently and better affect the state of the system.
In the article we proposed, the types of accumulators are described in detail, the rules from the selection are given. We conveyed in detail how the equipment is installed and adjusted. Our recommendations will ensure trouble-free operation of the device and extend its working life.
The principle of operation of a typical hydraulic tank
A hydraulic accumulator, it is also a hydraulic tank, it is also a battery or pressure tank - these are different names for the same device.
Outside it is really a metal tank, and inside the container is divided into two parts by a special rubber gasket, which is sometimes called a membrane.
Image Gallery
Photo from
The purpose of accumulators
Hydraulic tank as part of a pumping station
Installation in the downhole box
Hydraulic tank in tandem with submersible pump
Accumulator for deep well
Basement location of a private house
Automation of pumping water from the drive
Hydraulic accumulator in a summer cottage
The gasket is firmly fixed at the neck of the tank, where there is a hole for water intake. On the opposite side of the tank there is another hole, it is intended for air.
An ordinary nipple is installed here. Why is all this done? The membrane divides the hydraulic tank into two compartments. There is water on one side of this gasket, and air under a certain pressure on the other.
A pressure gauge is used to measure pressure in the accumulator. Some models are additionally equipped with a filter so that no contaminants get inside. The membrane material is special rubber. It is not only elastic, but also safe for human health.

The hydraulic accumulator is divided into two parts by a membrane. On one side of this liner is water, and on the other, air under pressure, which allows you to create a pressure in the water system
When a hydraulic tank is connected to a water supply system, water from such a device flows with a stable pressure, which improves the quality of tap water and provides the necessary conditions for the functioning of household appliances.

The membrane of the hydraulic tank contains a certain amount of water, which is constantly changing, therefore the membrane is constantly stretched or compressed. With an increase in the volume of water, gas is compressed, and pressure increases. The pressure register of the pressure switch gives the pump an on / off command
For example, for the normal operation of automatic washing machines, hydromassage devices and other similar equipment, certain pressure indicators in the water supply are required. Almost always, hydraulic accumulators are equipped with a special control device - a pressure switch.
This device can be configured so that it turns on and off the flow of water into the hydraulic tank, depending on air pressure. It works like this: as water is drawn from the device, the pressure in its air chamber decreases.
When it reaches the minimum mark, the pressure switch automatically switches on the pumping equipment in order to replenish the volume of water. As a result, the pressure in the hydraulic tank rises again. Upon reaching the maximum set pressure value, the relay switches off the flow of water into the accumulator.

This diagram allows you to get an idea of what place the accumulator occupies in the autonomous water supply system of a private house
Such a system can significantly reduce the number of pump on / off, and this extends the life of the equipment. If the pump were connected directly to the domestic water supply, the number of on and off cycles would be significantly higher.
The presence of such a tank in the water supply system ensures the stability of its operation, as well as protection against possible water hammer.
In addition, inside the accumulator there is always a certain supply of water, which can be very useful, for example, if the pump breaks down. Understanding the operating principles of the accumulator allows you to choose the right device, ensure its proper installation and maintenance.
Types of pressure vessels
Hydraulic accumulators differ in the type of installation: they are horizontal and vertical. Vertical accumulators are good in that it’s easier to find a suitable place for their installation.
Both the vertical and horizontal variety are equipped with a nipple. Together with water, a certain amount of air enters the device. It gradually accumulates inside and “eats” part of the tank’s volume. For the device to work properly, it is necessary to bleed this air from time to time through this very nipple.

According to the type of installation, vertical and horizontal hydraulic accumulators are distinguished. They have some differences in the maintenance process, but the size of the installation site largely affects the choice.
In hydraulic accumulators that are installed vertically, a nipple is provided, which is designed specifically for these purposes. It is enough to click on it and wait until the air leaves the device. With horizontal tanks, things are a little more complicated. In addition to the nipple for bleeding air from the tank, a shut-off valve is installed, as well as a drain into the sewer.
All this applies to models capable of accumulating a fluid volume of more than 50 liters. If the model’s capacity is less, then there are no special devices for removing air from the membrane cavity, regardless of the type of installation.
But air from them still needs to be removed. To do this, water is periodically drained from the accumulator, and then the tank is again filled with water.
Before starting the procedure, disconnect the power supply to the pressure switch and pump, or to the entire pump station, if the hydraulic tank is part of such a device. After that, you just need to open the nearest mixer.
Water is drained until the tank is empty. Then the valve is closed, power is supplied to the pressure switch and pump, water will fill the capacity of the accumulator in automatic mode.

Hydraulic accumulators with a blue housing are used for cold water, and red ones for heating systems. You should not use these devices in other conditions, since they differ not only in color, but also in the material of the membrane, and the ability to withstand a certain level of pressure
Typically designed for autonomous engineering systems, tanks vary in color: blue and red. This is an extremely simple classification: if the tank is blue, then it is intended for cold water systems, and if red - for installation in the heating circuit.
If the manufacturer did not designate his product with one of these colors, then the purpose of the device should be clarified in the technical passport of the product. In addition to color, these two types of accumulator differ mainly in the characteristics of the material used in the manufacture of the membrane.
In both cases, it is a high-quality rubber designed for contact with food. But in blue containers are membranes designed for contact with cold water, and in red - with hot.

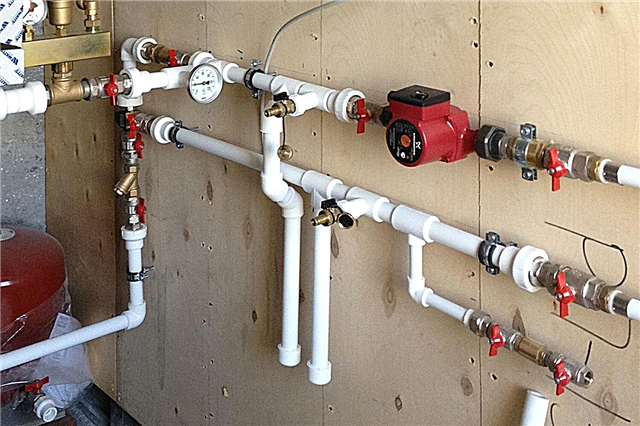
Very often, the accumulator is supplied as part of the pumping station, which is already equipped with a pressure switch, pressure gauge, surface pump and other elements
Blue devices can carry higher pressures than red containers. It is not recommended to use accumulators for cold water designed for domestic hot water systems and vice versa. Improper operating conditions will lead to rapid wear of the membrane; the hydraulic tank will have to be repaired or even completely replaced.
How to choose a suitable hydraulic tank?
One of the most important indicators when choosing a hydraulic accumulator is the amount of water that it can hold. To do this, you can use the following formula:

When choosing a hydraulic accumulator, you should calculate the appropriate volume of the device. Too small a hydraulic tank will not meet the needs of the system, and too large will lead to unjustified costs
And from this table you can take the value of the correction factor depending on the pump power:

When calculating the volume of the accumulator tank for a water supply system, a special correction factor should be used that takes into account the power of the water pump
For domestic needs, a device is usually sufficient, the capacity of which is about 25-50 liters. Of course, the calculated value rarely coincides with the actual volumes of typical models of hydraulic accumulators.
In this case, just take a tank with a little more volume. For example, if the value of 32.5 liters is calculated by the formula, then you can safely purchase a tank with a capacity of 35 liters.
It should be remembered that the external dimensions of the tank and the amount of water that it can accommodate are different numbers. Typically, water occupies about a third of the total accumulator. From the formula it becomes clear that the more powerful the pump is used for autonomous water supply in the house, the more capacious the hydraulic tank should be purchased.
Frequent blackouts in the area where the house is located, this is a good reason to choose a larger tank. Thus, the family will have a small supply of water.
However, do not be zealous and choose too large a hydraulic accumulator. In such a device, the water will be replaced too slowly, and this will lead to a deterioration in its quality.

This table provides details on exactly what volume of water can be stored in a hydraulic accumulator with specific characteristics
That is why the calculations take into account the maximum amount of water that passes through the water supply system. Another important point relates to models of foreign production. Such devices can not always be easily connected to plumbing systems in Russia or in the neighboring countries.
Image Gallery
Photo from
The average volume for a country house and cottage
Hydraulic tank for surface pumps
Hydropneumatic capacity for deep wells
Branched water tank
Installation and adjustment
The installation of a hydraulic accumulator is subject to more stringent requirements than when installing a conventional storage tank. The fact is that the drive installed in the attic is static, but the hydraulic tank is in dynamic motion: water enters and is taken from the tank, the membrane is stretched and compressed, etc.
To prevent vibration from being transmitted to the water supply system and surrounding objects, the accumulator is installed on an even and solid base, using shock-absorbing rubber gaskets.
The place where the hydraulic tank is installed should be quite spacious and affordable. Such devices require periodic configuration, inspection and maintenance.
Before installation, it is necessary to find out what pressure should be in the empty accumulator. The nominal value of this indicator is usually 1.5 bar. This is the pressure that the manufacturer sets. However, over time, part of the air may exit the tank.

To measure the pressure in the accumulator, you can use any serviceable pressure gauge, which allows you to get information with an accuracy of at least 0.5 bar
Therefore, you should measure the pressure with a manometer, and then pump air or bleed it if the pressure is excessive. It does not hurt to also clarify the value of the normal air pressure in an empty tank using the product data sheet. Since the spool has standard sizes, almost any pressure gauge is suitable for measurements.
If for some reason the accumulator is not equipped with a measuring device, you can take a car pressure gauge. The main thing is that it be serviceable and accurate enough. A scale with divisions of 0.5 bar or less is required. Electronic devices can also be used for such measurements.
Water pipes are connected using flexible adapters. It should be remembered that the diameter of the adapters must correspond to the size of the water pipes, narrowing is unacceptable. Before filling the tank with water, all air must be removed from the membrane.

To absorb vibrations that occur during the operation of the accumulator, when connecting the device to the plumbing system, special flexible hoses of the appropriate diameter are used
The first time water is pumped in as slowly as possible, in a thin stream with a low pressure. This is necessary so as not to damage the membrane, which could become caked or slightly deformed during storage.
Such nuances may seem trifles, but they can significantly affect the condition of the tank. An important point is also the pressure setting in the tank.
After the accumulator is filled with water, you need to once again measure the air pressure. The less air in the tank, the lower its pressure, the more water can be pumped into it. But the less air, the lower the working pressure of the water at the outlet of the accumulator.
It is allowed to reduce the air pressure in the device to a level of 1 bar, if there is a need to create an additional volume of water for storage. However, the pressure of the water in the system will decrease. The owner of the device will have to choose between good pressure and the ability to pump a large amount of water into the tank.
In any case, the minimum air pressure should be 1 bar. If there is little air in the tank, the membrane insert filled with water will stretch and may touch the metal walls of the tank. Such contact is unacceptable, since under its influence the rubber will begin to break down, the accumulator will break, and the membrane will have to be replaced.
Image Gallery
Photo from
Work in tandem with a pressure switch
Pressure Switch Location
Dry Relay Location
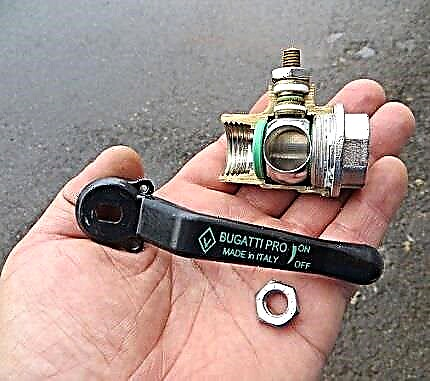
Crane for equipment conservation
After the hydraulic tank is full, configured and connected to the water supply system, you can configure the pressure switch. It is usually provided with instructions detailing the procedure.
Under the cover of the device housing are two adjustment springs. A large spring, designated as P, allows you to set the minimum pressure at which the relay turns on the pump and starts pumping water into the accumulator.
Using a small spring, designated as P, set the difference between the upper and lower pressure, i.e. shut-off and turn-on pressure. As water is withdrawn from the hydraulic tank, the pressure changes.
When it reaches the bottom mark, the relay contacts will close and the pump will turn on. During the adjustment process, the pressure switch will have to fill up the accumulator a couple of times, and then empty it.
Typically, the difference between on and off pressure is about two bar. In the passport of the hydraulic tank, the maximum pressure for which the device is designed is indicated, however, it makes no sense to try to pump it “to the eyeballs”.
When operating at extreme levels, the elements of the device wear out faster. In the process of setting the pressure switch, one important point should be taken into account - the difference between the shut-off pressure and the air pressure in the accumulator should be about 10%.
Recommendations for use
After the accumulator is installed, it must be properly maintained. About once a month, you should check the settings of the pressure switch and adjust them if necessary. In addition, it is necessary to check the condition of the housing, the integrity of the membrane and the tightness of the joints.
The most common breakdown in hydraulic tanks is membrane rupture. Constant cycles of tension - compression over time lead to damage to this element. Sudden changes in the pressure gauge usually indicate that the membrane is torn and water enters the “air” compartment of the accumulator.
To make sure there is a breakdown, you just need to bleed all the air out of the device. If water flows from the nipple after it, it means that the membrane definitely needs to be replaced.
Fortunately, such repairs are relatively easy. To do this, you must:
- Disconnect the hydraulic tank from the water supply and power supply.
- Unscrew the bolts that hold the neck of the device.
- Remove the damaged membrane.
- Install a new membrane.
- Assemble the device in the reverse order.
- Install and connect the hydraulic tank.
Upon completion of the repair, the pressure settings in the tank and pressure switch should be checked and adjusted. The connecting bolts must be tightened evenly to prevent the new membrane from skewing, and so that its edge does not slip into the tank body.

Replacing the accumulator membrane is relatively easy, but care must be taken to ensure that the new membrane is the same as the previous one.
To do this, install the bolts in the sockets, and then alternately make literally a couple of turns of the first bolt, go to the next, etc. Then the membrane will be pressed against the body equally around the entire circumference. A common mistake by beginners in repairing a hydraulic accumulator is the misuse of sealants.
The installation site of the membrane does not need to be treated with sealant; on the contrary, the presence of such substances can damage it. The new membrane must be exactly the same as the old one in volume and configuration. It is better to first disassemble the accumulator, and then, armed with a damaged membrane as a sample, go to the store for a new element.
In this video, the operating principle of the accumulator is described in detail:
To calculate the volume of the accumulator, you can use special calculator programs. One of these options is presented in the following video:
Replacing the tank’s membrane is not too complicated. It is discussed in detail in this video:
A hydraulic accumulator is an important part of a modern autonomous water supply system. Of course, this device is more complicated and more expensive than a conventional storage tank.
But all the costs are fully paid off, since with a hydraulic tank the quality of tap water is better, and the service life of pumping equipment increases significantly. Finally, it is simply convenient, because the water supply always has a stable pressure of water, which is taken care of by reliable automation.
Please write comments in the block form below. Ask questions about the points of interest in the information provided, share useful information, post photos and tips. Perhaps your recommendations will be useful to site visitors.