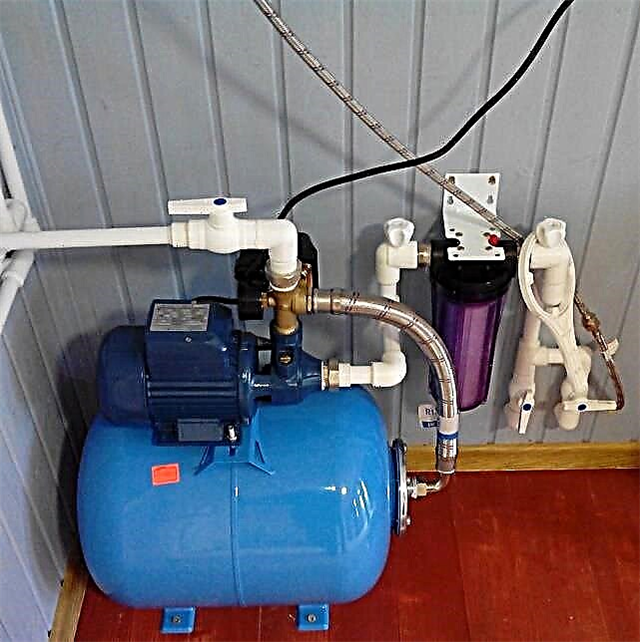
In order for the water pressure in the autonomous water supply (heating) system to remain stable, a special device is installed in it - a hydraulic accumulator. At the same time, an integral part of this unit is a very small device - a pressure switch.
If the latter is not configured correctly, the hydraulic accumulator will constantly turn on and off without special need. As a result, we get an excessive consumption of electricity and rapid wear of pumping equipment.
Agree, installing a hydraulic accumulator at home, we want to increase the efficiency of the water supply system and the stability of its operation. However, if the adjustment of the pressure switch is made with errors, then the task cannot be achieved. Setting up this small device is extremely important to make accurately and according to the rules. Moreover, it is necessary to regulate it both during the initial installation, and in the future, during continuous operation.
The principle of operation of the pressure switch
An autonomous water supply system in a private house consists of water pipes, a pump and control and cleaning elements. The accumulator in it plays the role of a device for controlling the pressure of water. First, the latter is stored in the battery, and then, as necessary, it is consumed when opening the taps.
This configuration of the water supply system allows to reduce the operating time of the pumping station, as well as the number of its “on / off” cycles.
The pressure switch here has the function of controlling the pump. It monitors the level of filling of the accumulator with water, so that when this tank is emptied, it will turn on pumping fluid from the intake in time.

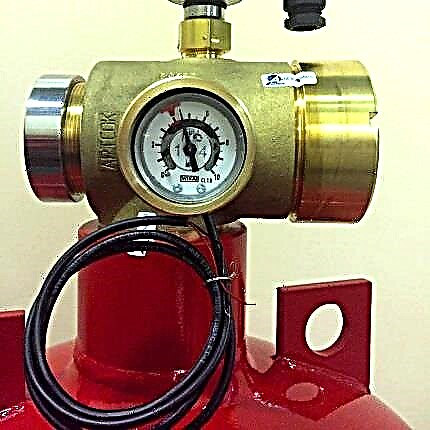
The main elements of the relay are two springs for setting pressure parameters, a membrane with a metal insert that responds to water pressure and a contact group 220 V
If the water pressure in the system is within the parameters set on the relay, then the pump does not work. If the pressure drops below the minimum setting Rpusk (Pmin, Rvkl), then an electric current is supplied to the pump station to make it work.
Further, when filling the accumulator to rstop (Pmax, upset), the pump is de-energized and turned off.
Step by step, the relay in question works as follows:
- There is no water in the accumulator. Pressure is lower. Start-up is set by a large spring, the membrane in the relay moves and closes the electrical contacts.
- Water begins to flow into the system. Upon reaching Rstop - the difference between the upper and lower pressures is set by a small spring, the membrane moves and opens the contacts. The pump stops working as a result.
- Someone in the house opens the tap or turns on the washing machine - in the water supply there is a decrease in pressure. Further, at some point, the water in the system becomes too small, the pressure again reaches the start-up. And the pump turns on again for pumping.
Without a pressure switch, all these manipulations with turning on / off the pumping station would have to be done manually.

In the data sheet, the pressure switches for pressure accumulators indicate the factory settings for which the control springs were initially set - almost always these settings have to be changed to more suitable
When choosing the pressure switch in question, first and foremost, you should look at:
- maximum temperature of the working medium - for domestic hot water and heating its own sensors, for domestic hot water;
- pressure adjustment range - the possible settings of Rstop and Rpusk must correspond to your specific system;
- maximum working current - pump power should not be higher than this parameter.
The pressure switch under consideration is configured on the basis of calculations taking into account the capacity of the accumulator, the average one-time water flow by consumers in the house and the maximum possible pressure in the system.
The more capacious the battery and the greater the difference between Rstop and Rpusk, the less often the pump will turn on.
The first step before setting up
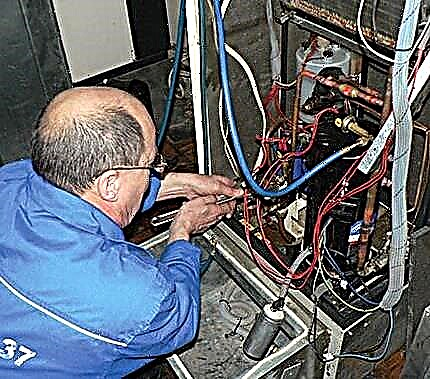
The pressure switch is adjusted during the initial installation and then, in the event of any problems in the water supply system.
In the second case, before starting to configure the relay unit, you must establish the cause of the problem. Perhaps the matter is not at all in the device in question, there is no need to touch it.

Before setting up the relay, make sure that the accumulator, pipes and fittings are holding pressure. If there are fistulas and leaks in the system, you must first get rid of them
The second crucial point is water treatment. The accumulator and relay have a rubber membrane. If sand gets into the pipes, then this gum will deteriorate (crack) and will cease to hold pressure. In a system with a hydraulic accumulator, cleaning filters must be present.
If the pressure in the water supply by the pressure gauge reaches Rstop, but the pump continues to work, then the problem usually lies in the clogging of pipes and / or filters. It is also possible with the departure to the relay of the voltage supply contacts to the pump station. In the first case, you need to get rid of sand and scale in the system, and in the second - check the contact group and wiring 220 V.
It is also possible that the water from the pipes in the house is completely drained, but the pump does not want to turn on. Here, the first thing we check is the power supply.
If there is voltage in the network, wiring and contacts are OK, then "9 out of 10" the pressure switch is out of order. It will have to be changed to a new one, somehow it is almost impossible to repair this device.
Step-by-step adjustment instructions
Conventional sanitary ware gaskets are designed for 6 bar, maximum and for a short time are able to withstand up to 10 bar. And the working pressure in the water supply and heating systems of residential buildings in most cases ranges from 2–3.5 bar.
It is not worth putting on a Rstop relay above 4 bar. Most household models of this device on the market have a maximum stop of 5 bar. However, setting this parameter to the maximum of “five” is not recommended.
It is impossible to tighten or loosen the springs on the device to the stop, it can lead to its incorrect operation. A small margin of tension / looseness must be left.

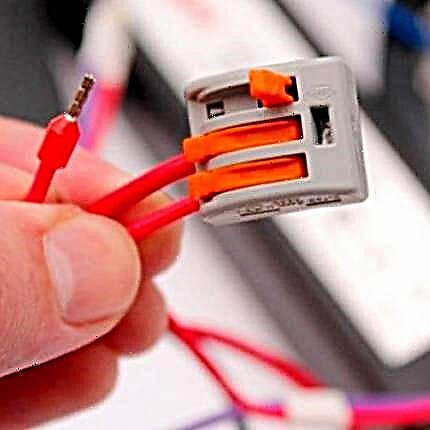
A circuit from the 220 V network to the pump power passes through the pressure accumulator pressure switch, before starting the adjustment of the device, it must be de-energized
Big spring - setting the pressure to start the pump. Small spring - sets the pressure difference to turn off the pumping station.
The accumulator relay is configured as follows:
- Water drains from the water supply. Then, in the accumulator, the working pressure is set in the pear with air - 10% less than the planned Rstop.
- The power to the relay is turned on, the pump starts to work. Using the pressure gauge, the pressure is recorded when it turns off (Rstop).
- A little tap opens in the sink in a small stream. The pressure is fixed when the pump is switched back on (Start).
To increase the start-up value, tighten the large spring clockwise. To increase the difference between Start and Stop, tighten the small spring.
These settings are reduced by loosening the springs counterclockwise.

In the passport on the relay, the minimum pressure drop between Rstop and Rpusk (usually 0.8 or 1 bar) is indicated, you can not set a small spring to lower parameters
After setting the required Startup and Rstop, the relays with the pump are connected to the network. If, according to the pressure gauge, everything works as it should, then the setup is complete.Otherwise, the three above steps are repeated again.
Expert Advice
It is recommended to connect the pressure accumulator pressure switch to the electrical panel of the house via a separate line with its RCD.
It is also mandatory to ground this sensor, for this there are special terminals on it.

It is permissible to tighten the adjusting nuts on the relay to the stop, but it is not recommended at all. A device with tightly tightened springs will work with large errors according to the set start-up and rstop, and will soon fail
If water is visible on the housing or inside the relay, the device must be de-energized immediately. The appearance of moisture is a direct sign of a rupture of the rubber membrane. Such a unit must be replaced immediately; it cannot be repaired and continued to operate.
Cleaning filters in the system must be installed without fail. No way without them. However, they must be cleaned regularly.
Also, once a quarter or six months, the pressure switch itself should be flushed. To do this, the cover with an inlet pipe from the bottom is unscrewed on the device. Next, the opened cavity and the membrane located there are washed.

The main cause of damage to the accumulator relay is the appearance of air, sand or other contaminants in the pipes. The rubber membrane ruptures, and as a result, the device must be replaced
Checking the pressure switch for correct operation and general serviceability should be done every 3-6 months. At the same time, the air pressure in the accumulator is also checked.
If during the adjustment there are sharp jumps of the arrow on the manometer, then this is a direct sign of a breakdown of the relay, pump or hydraulic accumulator. You must turn off the entire system and begin its full check.
How to properly configure the pressure switch:
In simple words about the pressure switch for pressure storage tanks:
How to adjust the pressure switch in the pump station:
Without a properly working and correctly configured pressure switch, the accumulator turns into an unnecessary piece of iron. At first glance, the adjustment of the device in question looks extremely simple - there are only two springs that need to be tightened / loosened. However, the configuration of this device has its own nuances. If mistakes are made during adjustment, then instead of using the hydraulic accumulator, it can bring only problems.
Do you have personal experience in setting up a pressure switch or have questions, write in the block with comments below. Our experts will certainly help you figure out the choice and setup of this device to maximize the efficiency of your water supply or heating system.